How to create an email sequence & use JoyAssist to write emails
How to create an email sequence & use JoyAssist to write emails
Email sequences in Synup OS help you automate outreach and stay consistent in your communication with prospects. With the help of JoyAssist, you can quickly draft personalized, professional emails that save you time and increase engagement.
Follow these steps to create your sequence and generate emails with JoyAssist:
Step 1: Navigate to Sequences
From the left-hand menu, click on Sequences > Email Sequences.
This will take you to the Email Sequences dashboard, where you can view all your existing sequences or create a new one.
Step 2: Create a New Sequence
Click on the Create Sequence button.
Step 3: Add Steps to the Sequence
Inside your sequence, click Add Step to add an email to the sequence. You can rename the sequence as per your wish.
3. Next, you can add merge fields to the email. These are dynamic values based on the details related to the lead. You can type [ to see all available merge fields or click the Available merge fields button on the top menu.
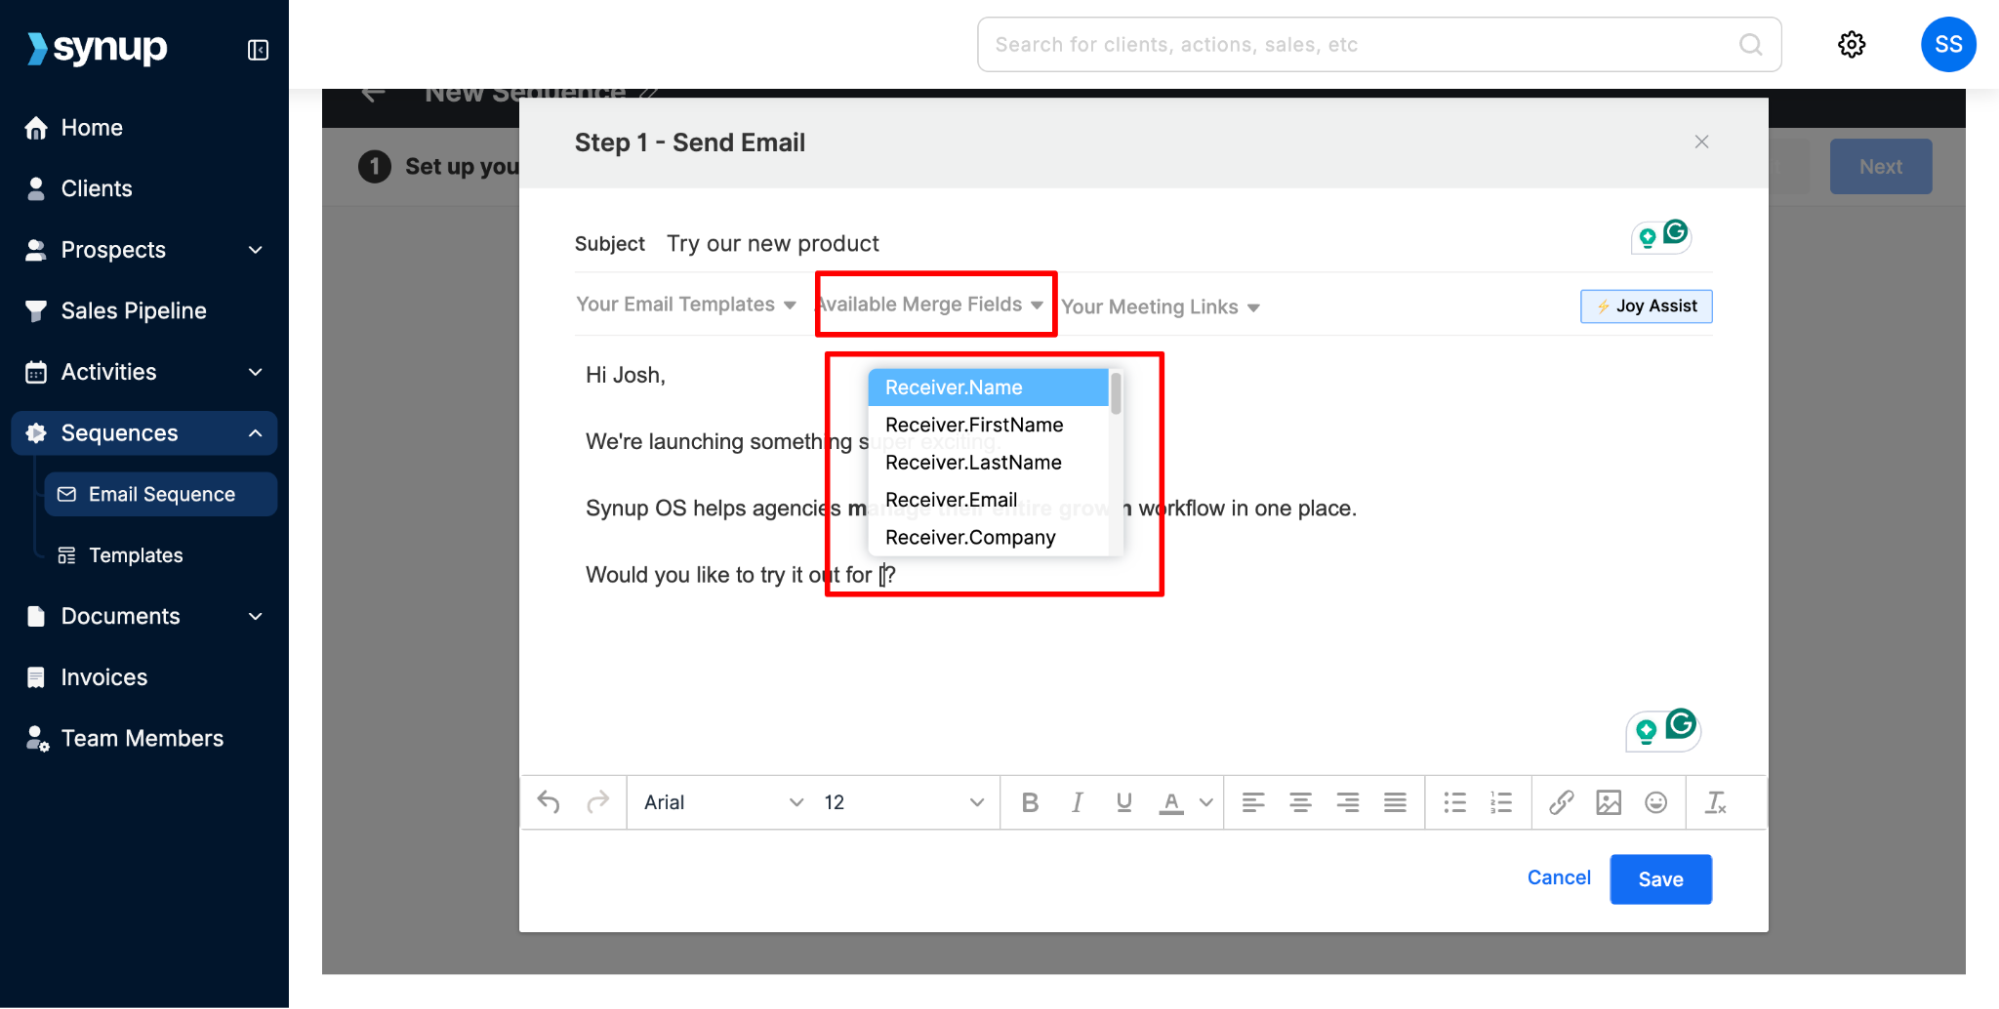
4. You can also choose from a variety of email templates to get started with your email copy.
Step 4: Use JoyAssist to Write Your Email
Need some help writing an email? Click on the JoyAssist button.
Enter a short prompt describing what you’d like JoyAssist to draft (e.g., “Write a follow-up email for a prospect who didn’t reply to my first message”).
Specify the tone and language of the email. JoyAssist will generate a complete email draft.
Review the content, make any edits if needed, and add it to your sequence step.
Step 5: Configure Sequence Settings
Once your email is ready, you will be taken back to the sequence steps screen. You can add more steps to your email sequence to nurture your prospects. For each step, you can specify how much delay the follow-up email is sent. For example, if email 1 goes on Day 1, you can set email 2 to go on Day 3 if you want a one-day gap.
Note: Leads will get automatically unenrolled from a running sequence if they reply to any of the emails in the sequence.
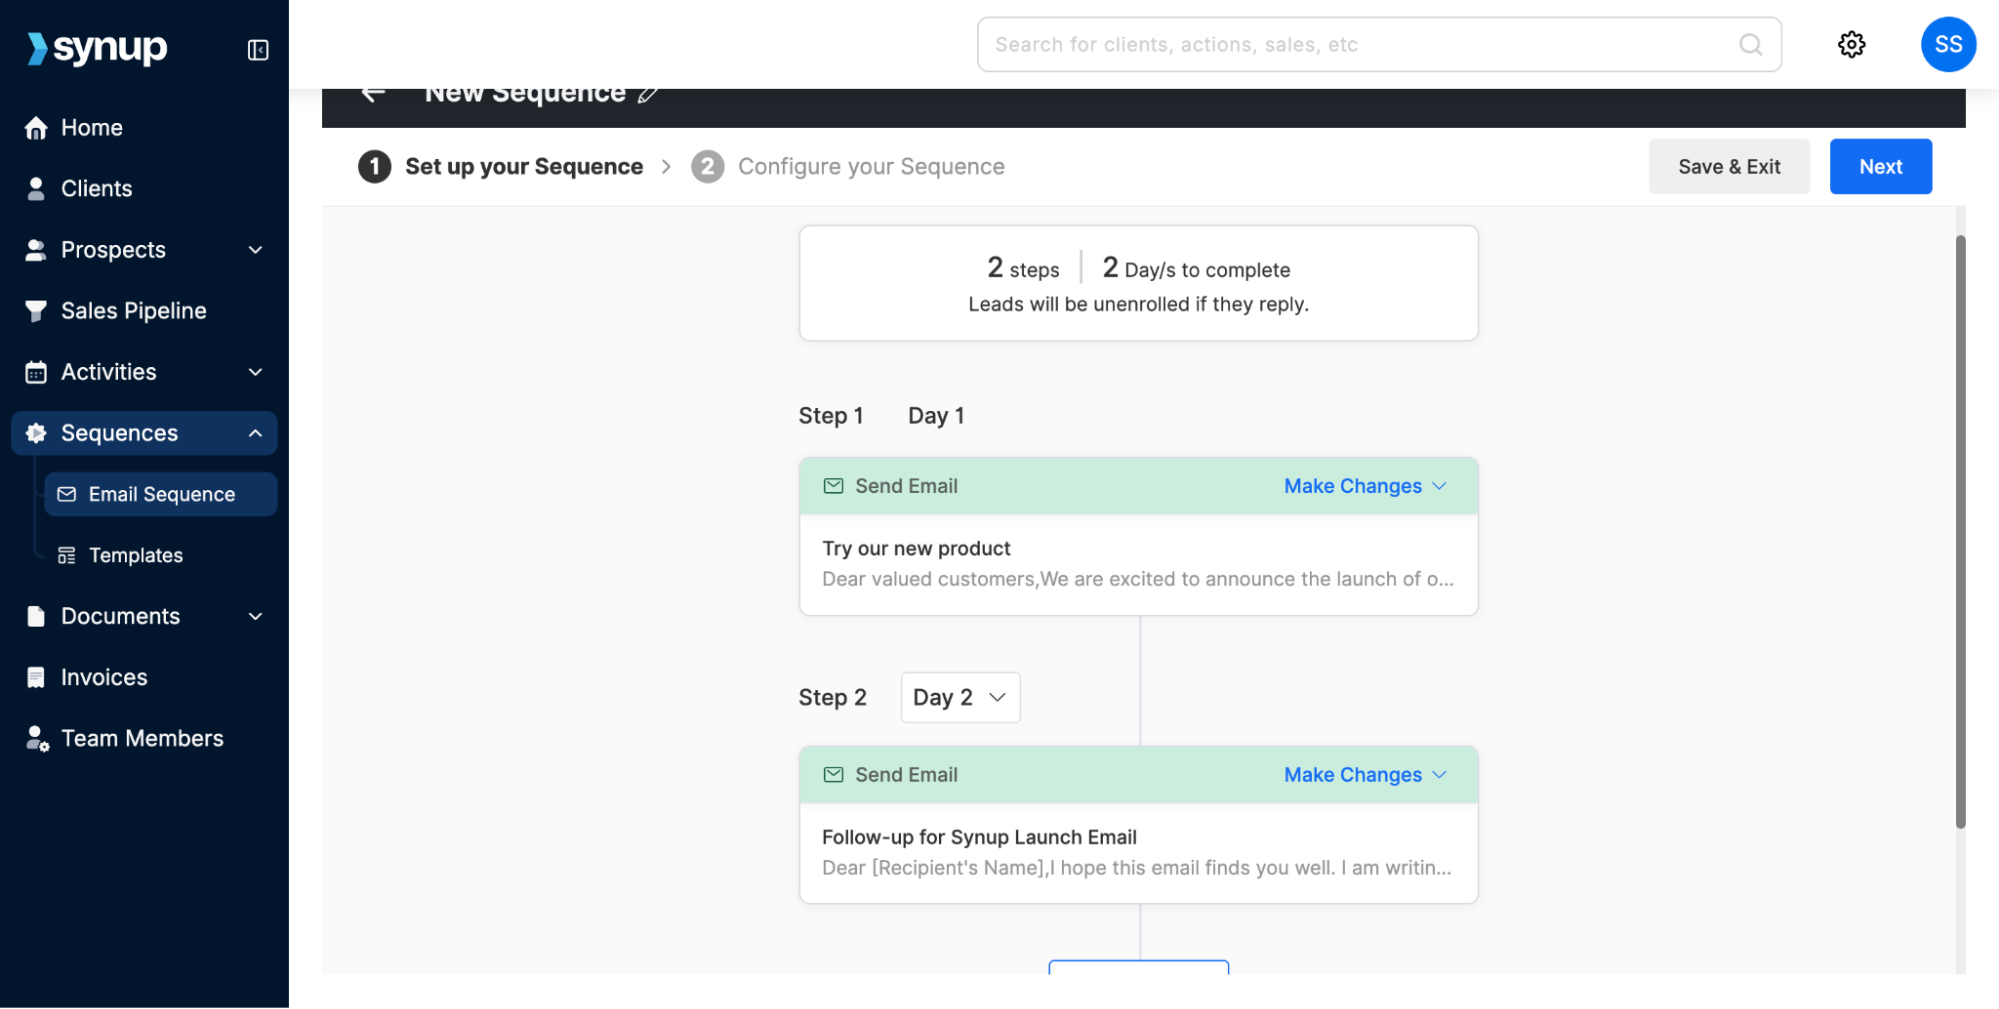
Once all steps are ready, click Next on the top right of the screen. In the next window, you have to specify when the cadence should start and on what days it runs. You can set the cadence to run only on business days.
Once your sequence is ready, click Save & Exit if you’d like to come back to it later. Or click Save & Enroll Leads to add prospects to your email cadence.
Step 6: Enroll Leads to the Sequence
From the leads you add to your sales pipeline, you can select the contacts you want to enroll in this sequence.
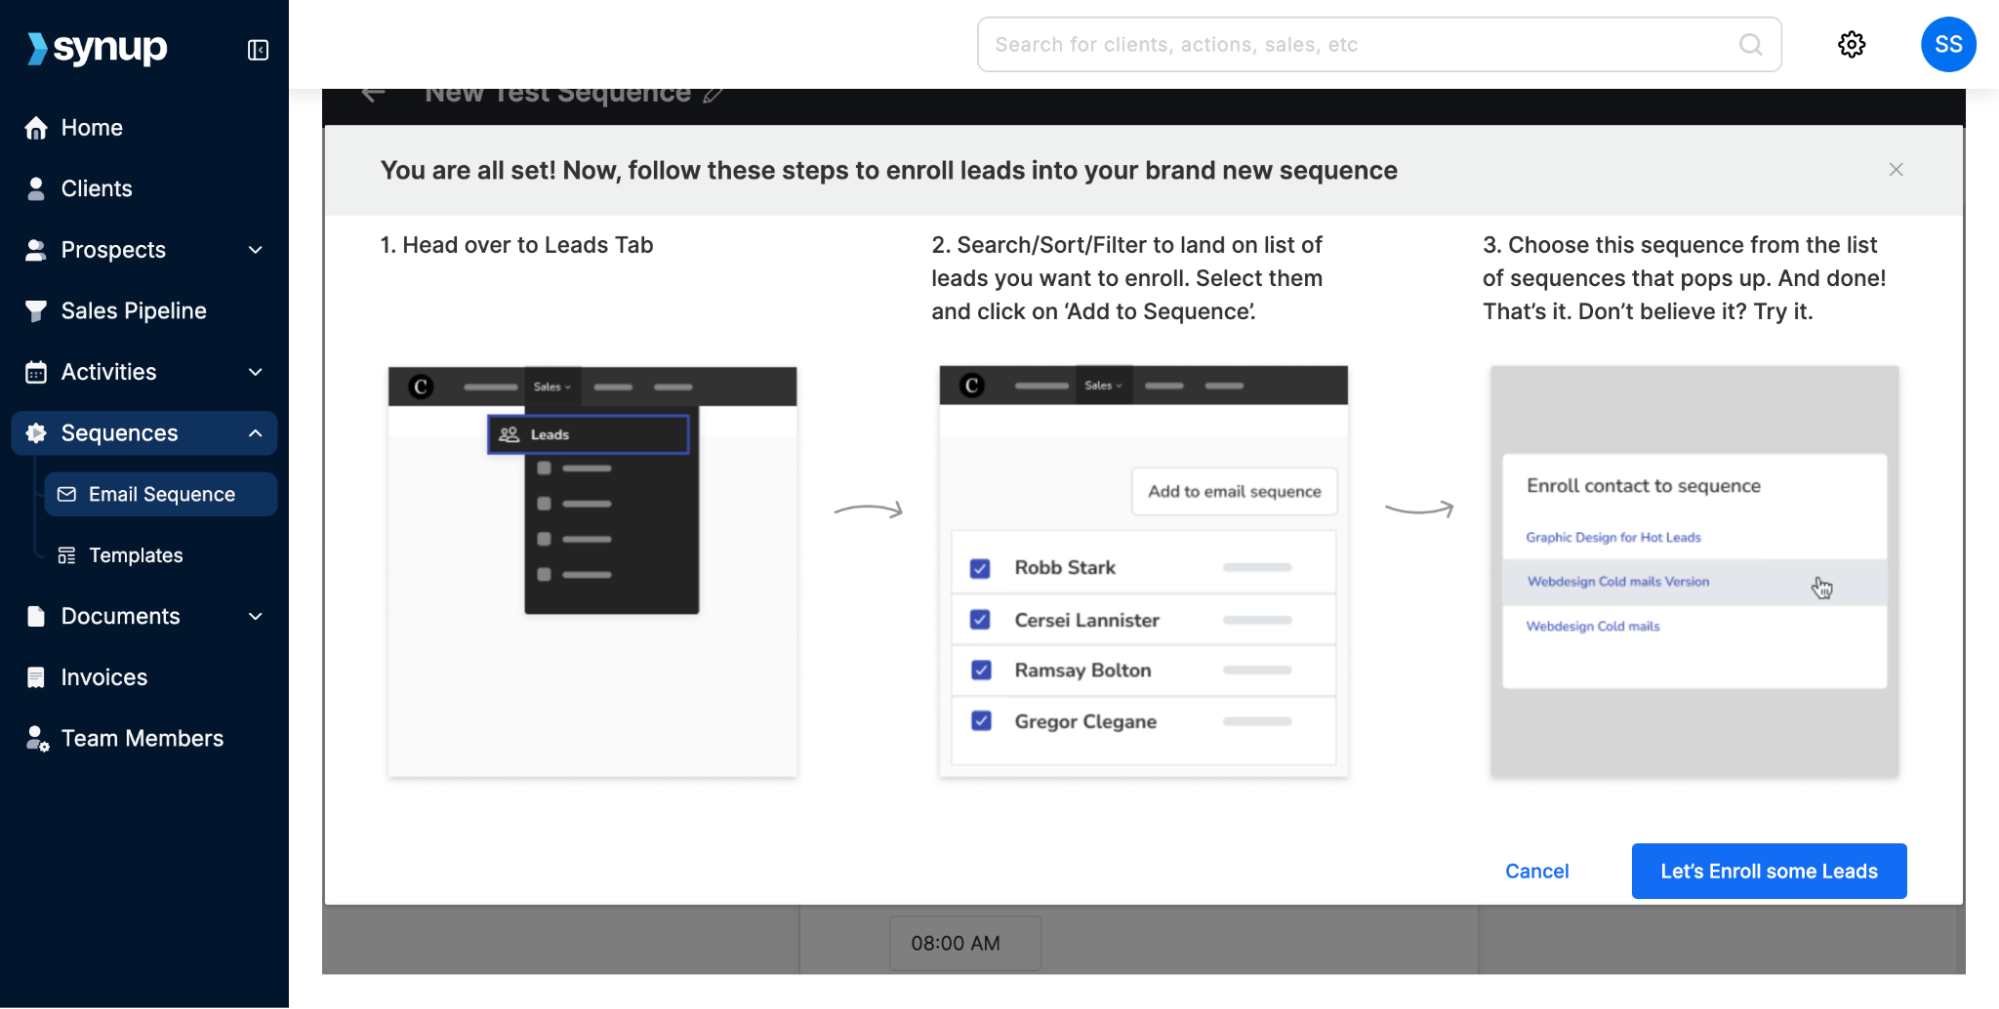
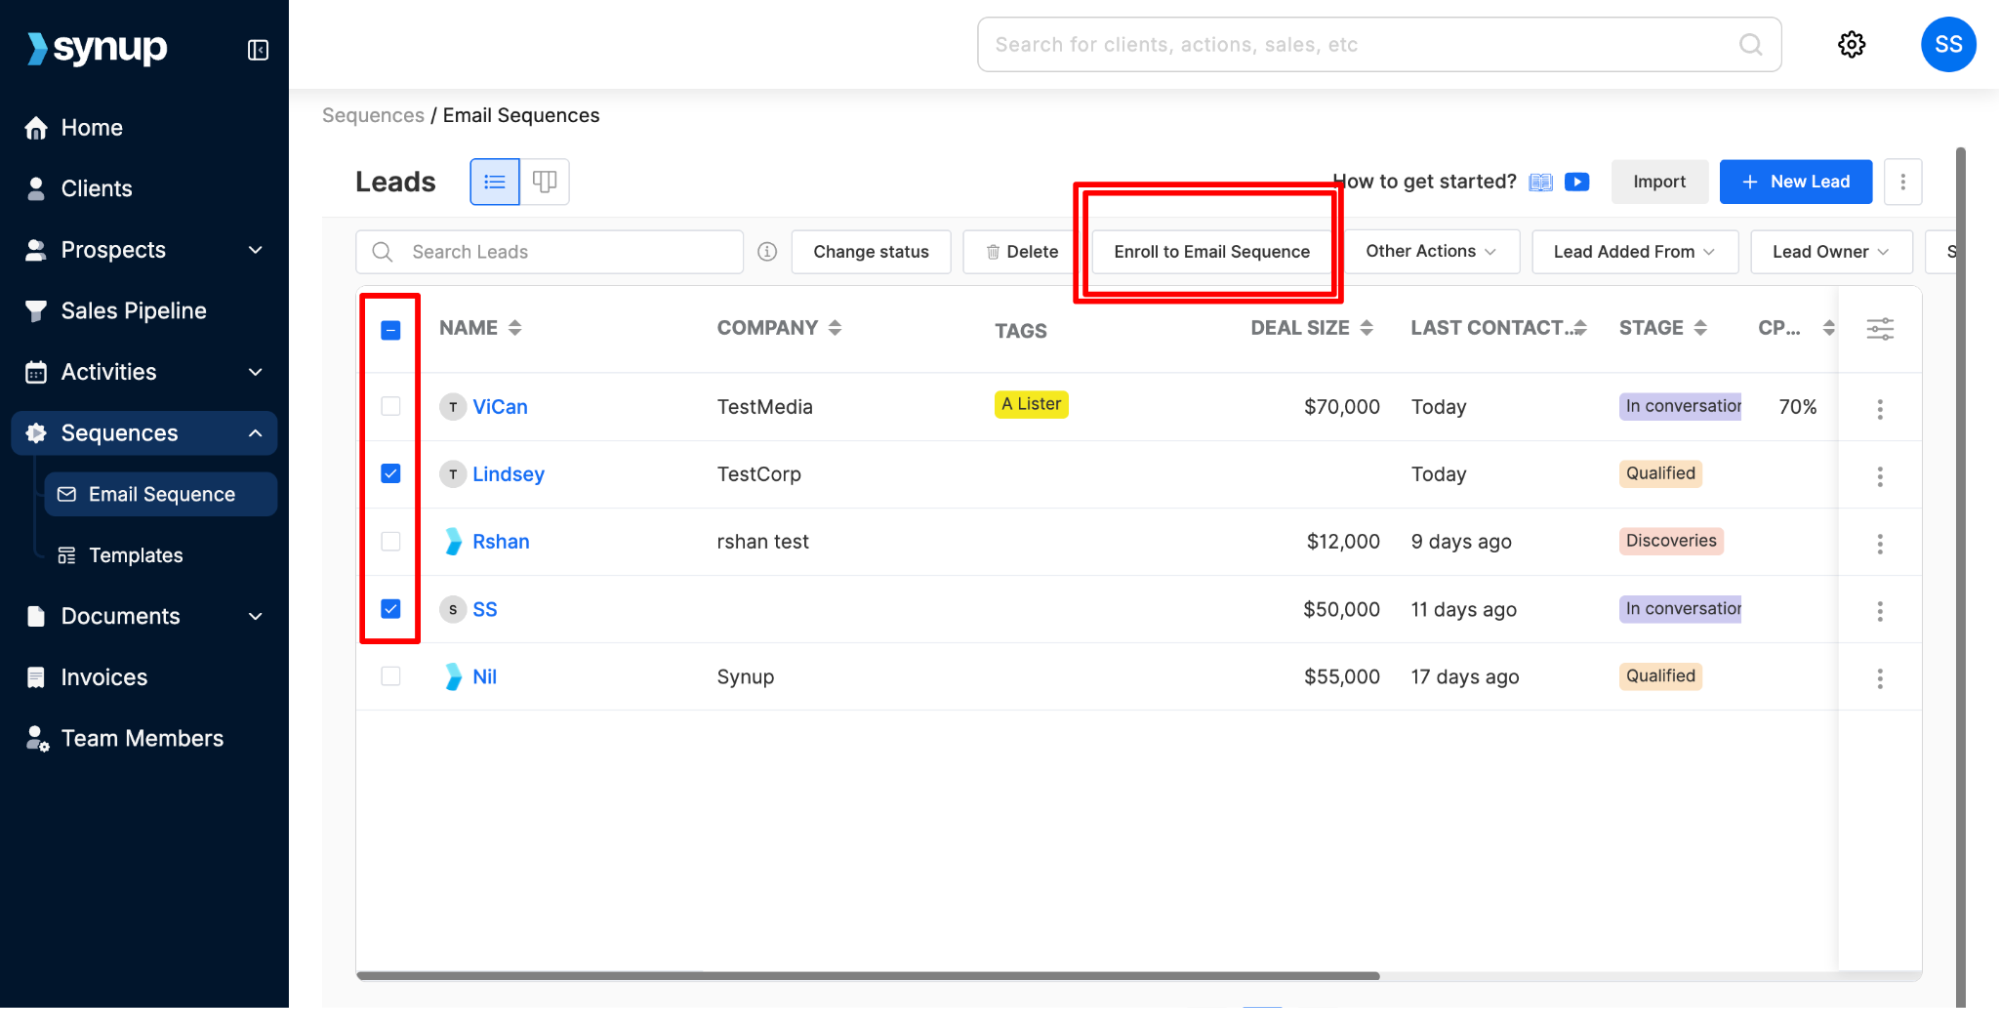
Click Enroll to Email Sequence and choose the one you created.
Click launch if you’re ready to launch the sequence for the leads you added.
✅ That’s it! You’ve successfully created an email sequence and used JoyAssist to write personalized, AI-powered emails in Synup OS.
Related Articles
How to create and use email templates
How to create and use email templates Email templates are a powerful tool to save time and ensure consistent communication. With Synup OS, you can create and use templates to quickly send emails for common scenarios, such as following up on proposals ...Email Digest Configuration: How to Send Automated Client Update Emails
Send Email Digests to Clients Client Update Emails automatically send your clients a summary of how their business is performing. The system reads each client's location data, detects what changed, and uses AI to write a personalized email, then ...How to monitor performance of an email sequence
How to monitor the performance of an email sequence Once you’ve created and launched an email sequence, it’s important to track how it is performing. Monitoring performance helps you understand engagement, optimize your messaging, and improve ...Email Setup
Email Setup Guide This guide explains how to configure the sender name, sender email address, and DKIM key for emails sent from Synup OS to your agency’s customers. Setting these up ensures your emails look professional, match your agency branding, ...How to enroll leads into a new or running email sequence
How to enroll new leads into an existing email sequence If you have an existing sequence running in Synup OS, you can easily enroll new leads into the sequence without having to create or copy the sequence from scratch. Let us show you how. Step 1: ...